Note: These tips are based on specific troubleshooting experience and may vary depending on your setup.
Basic Setup
Important: Figma's official documentation and Claude's official documentation provide different startup commands. The command in Figma's documentation doesn't work.
Figma's command (doesn't work):
claude mcp add --transport http figma-dev-mode-mcp-server http://127.0.0.1:3845/mcp
Claude's command (works):
claude mcp add --transport sse figma http://127.0.0.1:3845/sse
For the initial installation steps, you can still reference Figma's guide, but use Claude's command when adding the MCP server:
Troubleshooting
1. Fix Code Fetching Issues
If the MCP connects but can't fetch code from Figma:
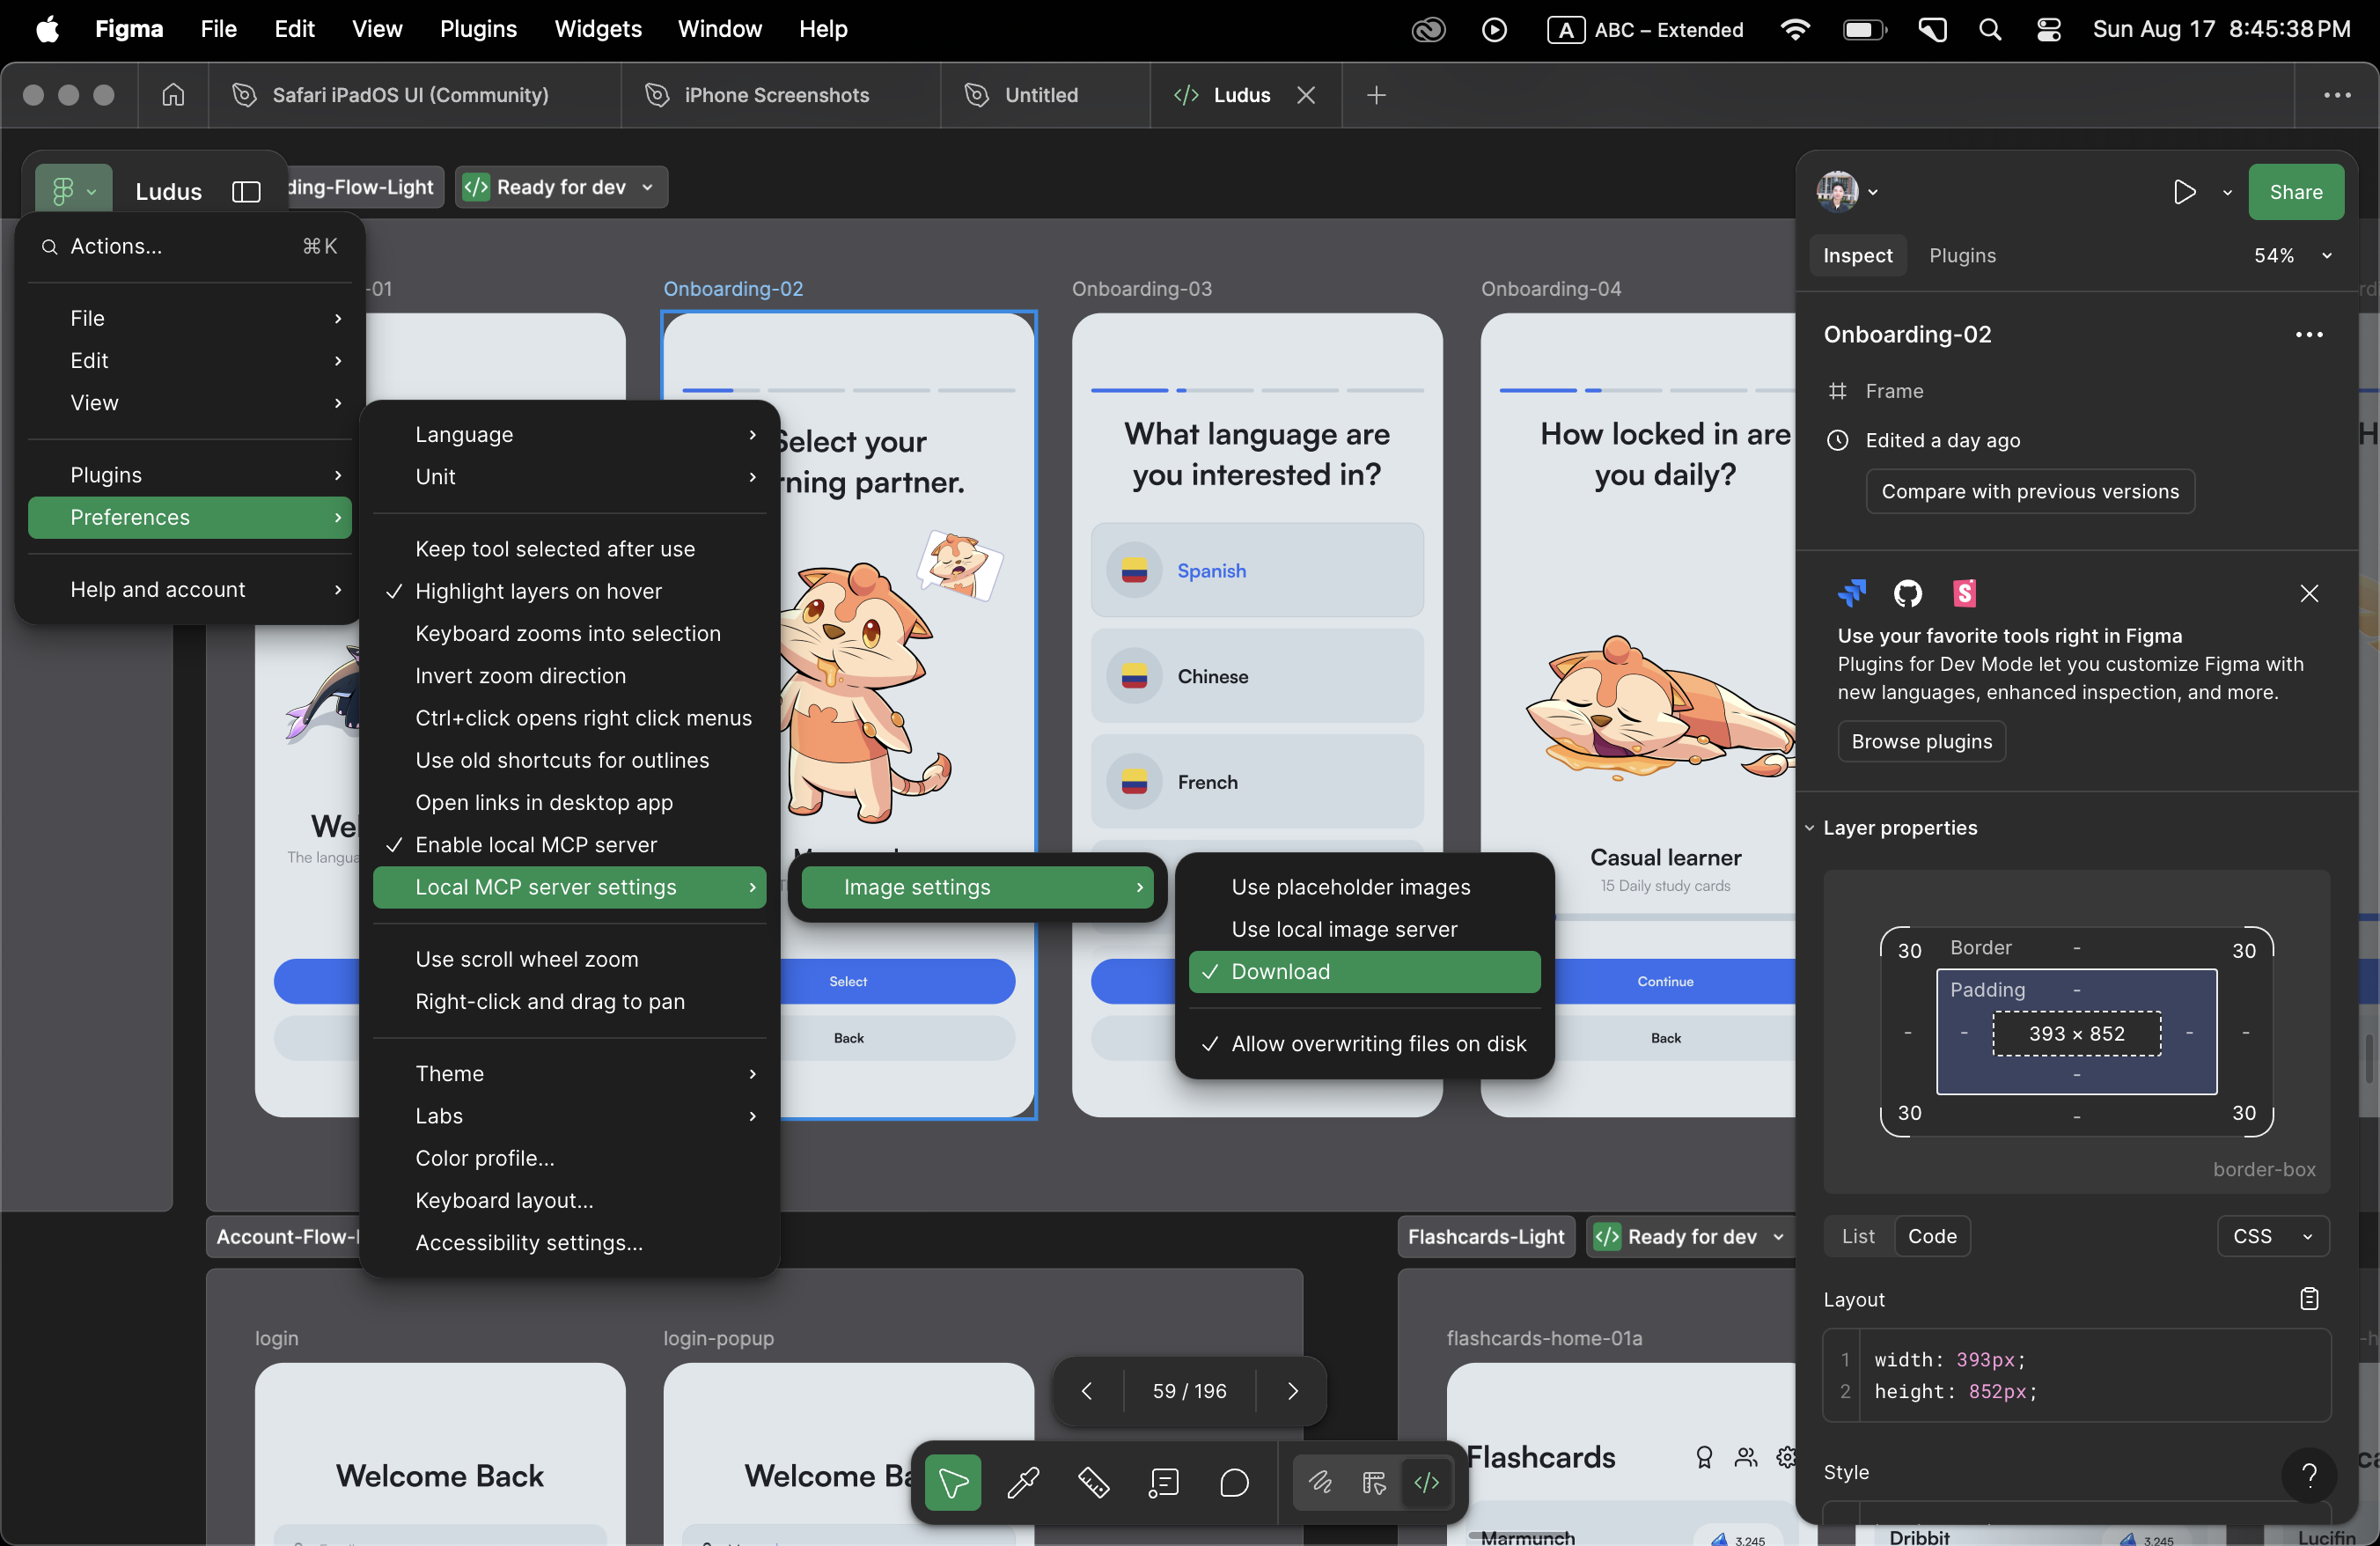
- Go to Local MCP server settings → Image settings
- Change to "Download" mode
- Enable "Allow overwriting files on Disk"
This was the critical fix that made code fetching actually work.
2. Two-Session Setup
The MCP often requires a two-step initialization:
- Start your first Claude Code session to establish the connection
- Close that session completely
- Start a fresh session - the MCP should now work properly
This seems related to how the configuration settings get initialized on first run.
3. Enable Developer Mode and Mark Frames
Before the MCP can fetch code from your designs:
- Switch to Developer Mode in Figma (press
Shift + D) - Mark your frames as "Ready for Development"
- Only frames marked as ready will be accessible through the MCP
This ensures you're only fetching code from finalized designs, not work-in-progress frames.
Verification
Once connected, test the MCP by selecting a frame in Figma and asking Claude "Which frame am I currently selecting?" If Claude can identify your selected frame, the connection is working properly!