The Problem
I wanted to recreate this Pokémon card pack opening animation for Ludus. Studying vocab should feel just as satisfying as ripping open a booster pack. But building an interaction like this is actually really complicated -- Pokémon uses Unity, a full 3D game engine, and I didn't have time to learn new software.
Then I found Remotion.
What is Remotion?
Remotion lets you create videos using React -- the same framework our app is built with. That's the key insight. Instead of learning a completely new tool, I could use the same language and mental model I already use every day.
You might be wondering: how does a video editor help with building an app? Remotion renders animations as React components. Every frame is a function of time. That means the same component that renders a frame of video can render a frame of interaction in your app.
The Stack
Here's what we used:
- React -- component architecture for the entire animation
- Remotion -- frame-based animation engine, hooks like
useCurrentFrame()andinterpolate() - React Native Skia -- GPU-accelerated canvas graphics via
@remotion/skiafor effects like radial gradients and the tap flash
Remotion's interpolate() function is the workhorse. You give it a frame number, an input range, and an output range, and it smoothly transitions between values. Every animation in the pack opening is built on this one primitive.
Building the Flashpack Animation
The animation is broken into phases, each a React component with its own timing:
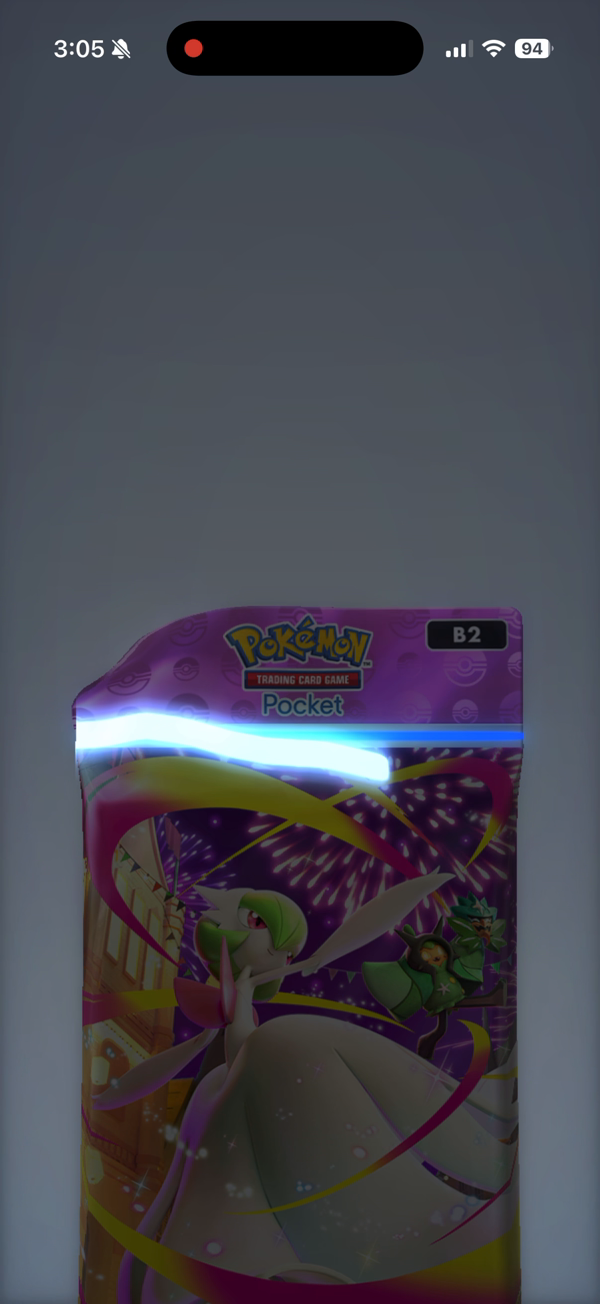
1. Pack Idle -- The booster pack floats in the center with a subtle breathing animation and a "Tap to Open" prompt.
2. Slide Down -- On tap, the pack slides down 500px and the UI fades out, building anticipation.
3. The Tear -- This is the hero moment. A glow line sweeps across the pack seam, then the top flap peels back in 3D (using CSS perspective and rotateX) and flies off screen while the bottom wrapper falls away with simulated gravity.
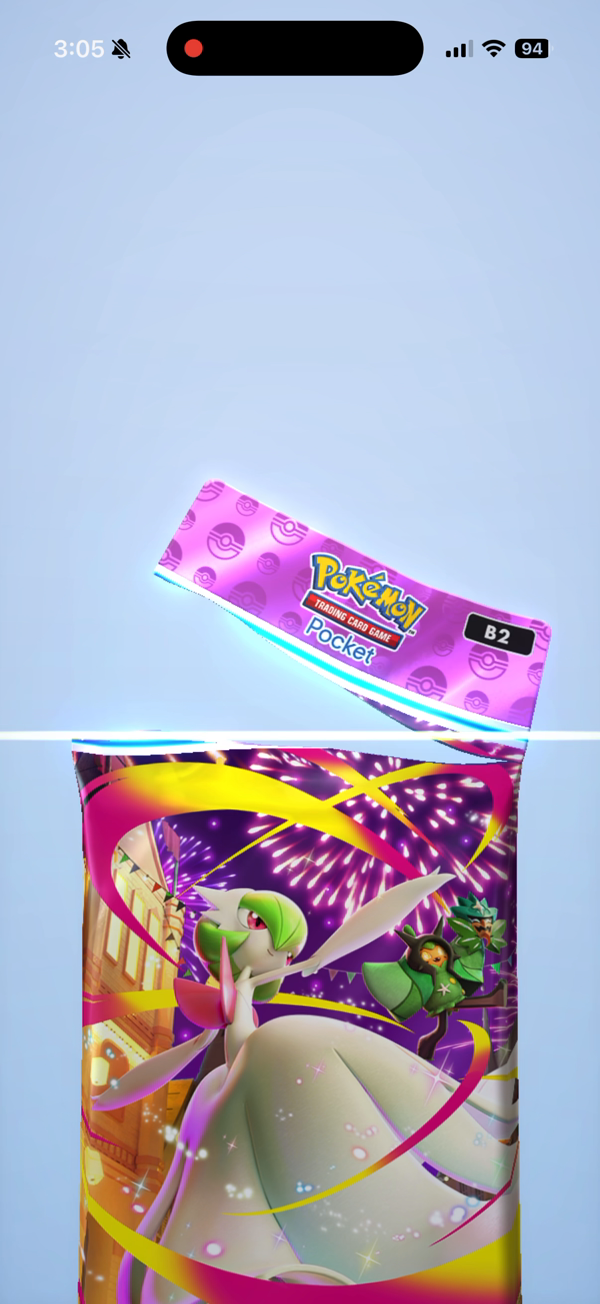
4. Effects Layer -- At the moment of tear, a rainbow burst of 12 rays explodes outward, 25 diamond-shaped sparkle particles scatter with gravity physics, and a white flash hits the screen. All of this is plain React and CSS -- no canvas, no WebGL.
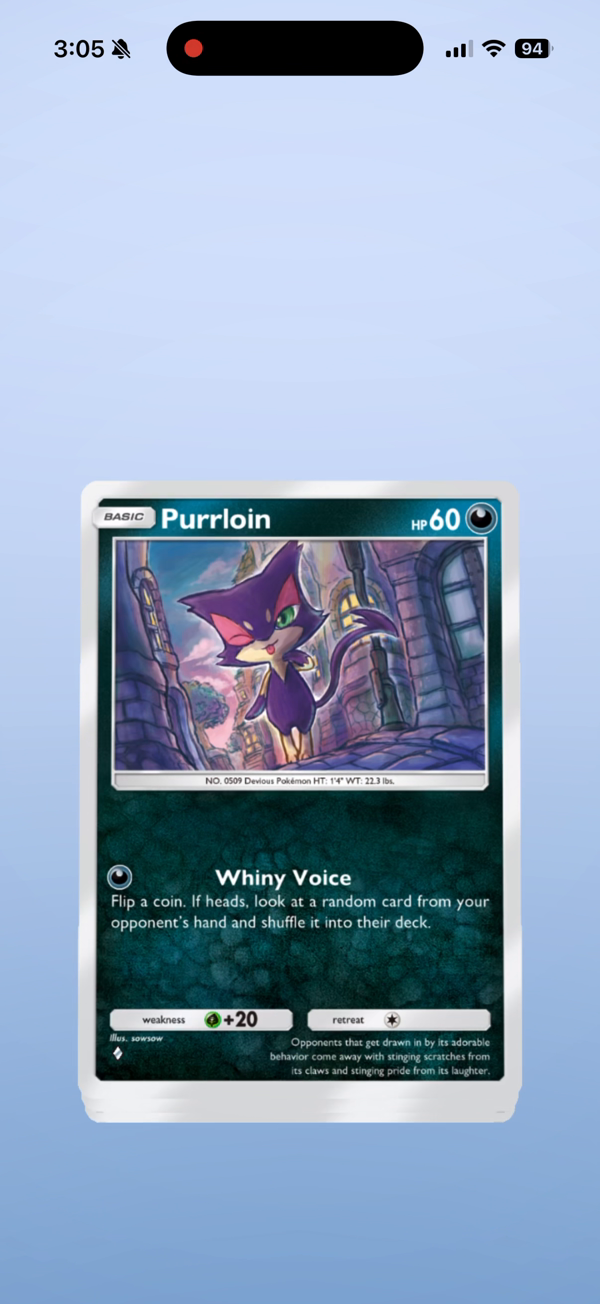
5. Card Reveal -- The first card rises from the center of the torn pack, scales up, and gets a shimmer overlay and "NEW" badge. Then it cycles through 5 cards in a carousel.
How It's Structured
src/
├── FlashpackVideo.tsx          # Main composition, orchestrates phases
├── config/
│   ├── timing.ts               # Frame ranges for each phase
│   ├── colors.ts               # Color palette
│   └── cards.ts                # Card data
└── components/
    ├── pack/                   # PackTear, TornFlap, TearGlowLine, FallingWrapper
    ├── effects/                # RainbowBurst, SparkleParticles, BokehParticle
    ├── cards/                  # CardEmerge, CardDisplay, CardReveal
    └── backgrounds/            # BokehBackground, NeutralGradient
Every phase has its own frame range defined in timing.ts. The main composition maps the current frame to the active phase and renders the corresponding components. Because everything is just React, you can compose, reuse, and refactor the same way you would in any app.
The Key Technique: interpolate()
Here's the core pattern that powers everything:
const frame = useCurrentFrame();

const opacity = interpolate(frame, [0, 30], [0, 1], {
  extrapolateRight: 'clamp',
});

const translateY = interpolate(frame, [0, 30], [500, 0], {
  extrapolateRight: 'clamp',
});
Frame 0 to 30: opacity goes from 0 to 1, translateY goes from 500 to 0. That's a card fading in and rising up. Every animation in the project -- the glow line sweep, the flap rotation, the sparkle trajectories -- is just a variation of this pattern with different frame ranges and easing curves.
From Video to App
The best part: because Remotion components are just React, dropping them into a React Native app is straightforward. The same PackTear component that renders frame 120 of a video can render the tear animation in response to a user tap. You swap useCurrentFrame() for a gesture-driven animation value, and the rest of the component stays the same.
Try It Yourself
- Install Remotion:
npx create-video@latest - Start the studio:
npm start-- this gives you a visual timeline editor - Build your composition using
useCurrentFrame()andinterpolate() - Render to video:
npm run buildoutputs an MP4 - Port to your app by swapping the frame source from Remotion's timeline to your app's animation driver
Remotion's studio lets you scrub through your animation frame by frame, which makes debugging way easier than console-logging values. You can see exactly what every component looks like at any point in time.
Tech is moving insanely fast, and the only limit now is your imagination. A year ago this would've taken a team of animators and a game engine. Today it's React components and a few prompts.